Nimbbl supports easy acceptance of payments on your WooCommerce store. We have created a simple plugin that you can install on your store. This guide will explain the step-by-step process to integrate the plugin.
- To see our checkout in action on Woocommerce you can click here and perform a live transaction.
Compatibilities and Dependencies
- WordPress Versions 5.0.0 to the latest
- WooCommerce Versions 6.0.0 to the latest
- PHP Versions 7.0.0 to the latest
Install Plugin
You can Install the Nimbbl plugin either from the Woocommerce Plugin Directory or by manually uploading the code zip file
Installing Automatically (Recommended)
It is recommended to install the plugin using the Woocommerce Plugin Directory. This helps you also setup automatic updates for the plugin.
Login into your Woocommerce Dashboard.
Go to Plugins > Add a new plugin.
Search for the keyword “Nimbbl”
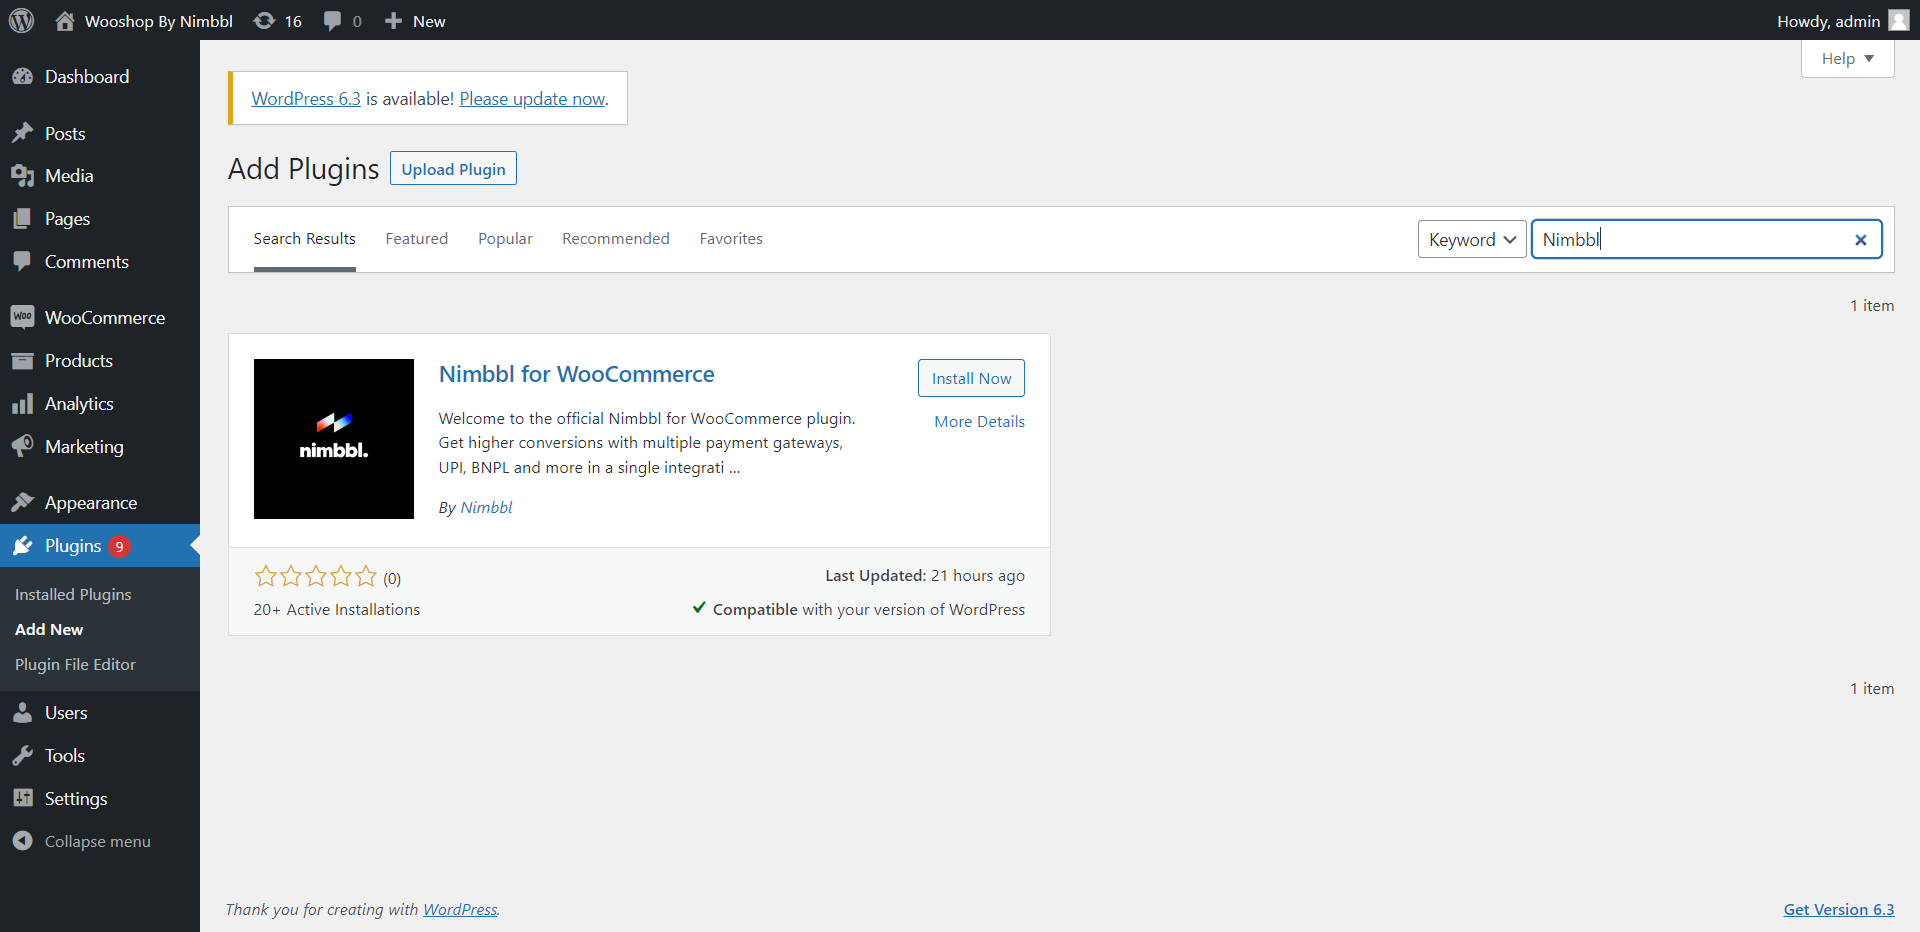
After the plugin is found, click on "Install Now"
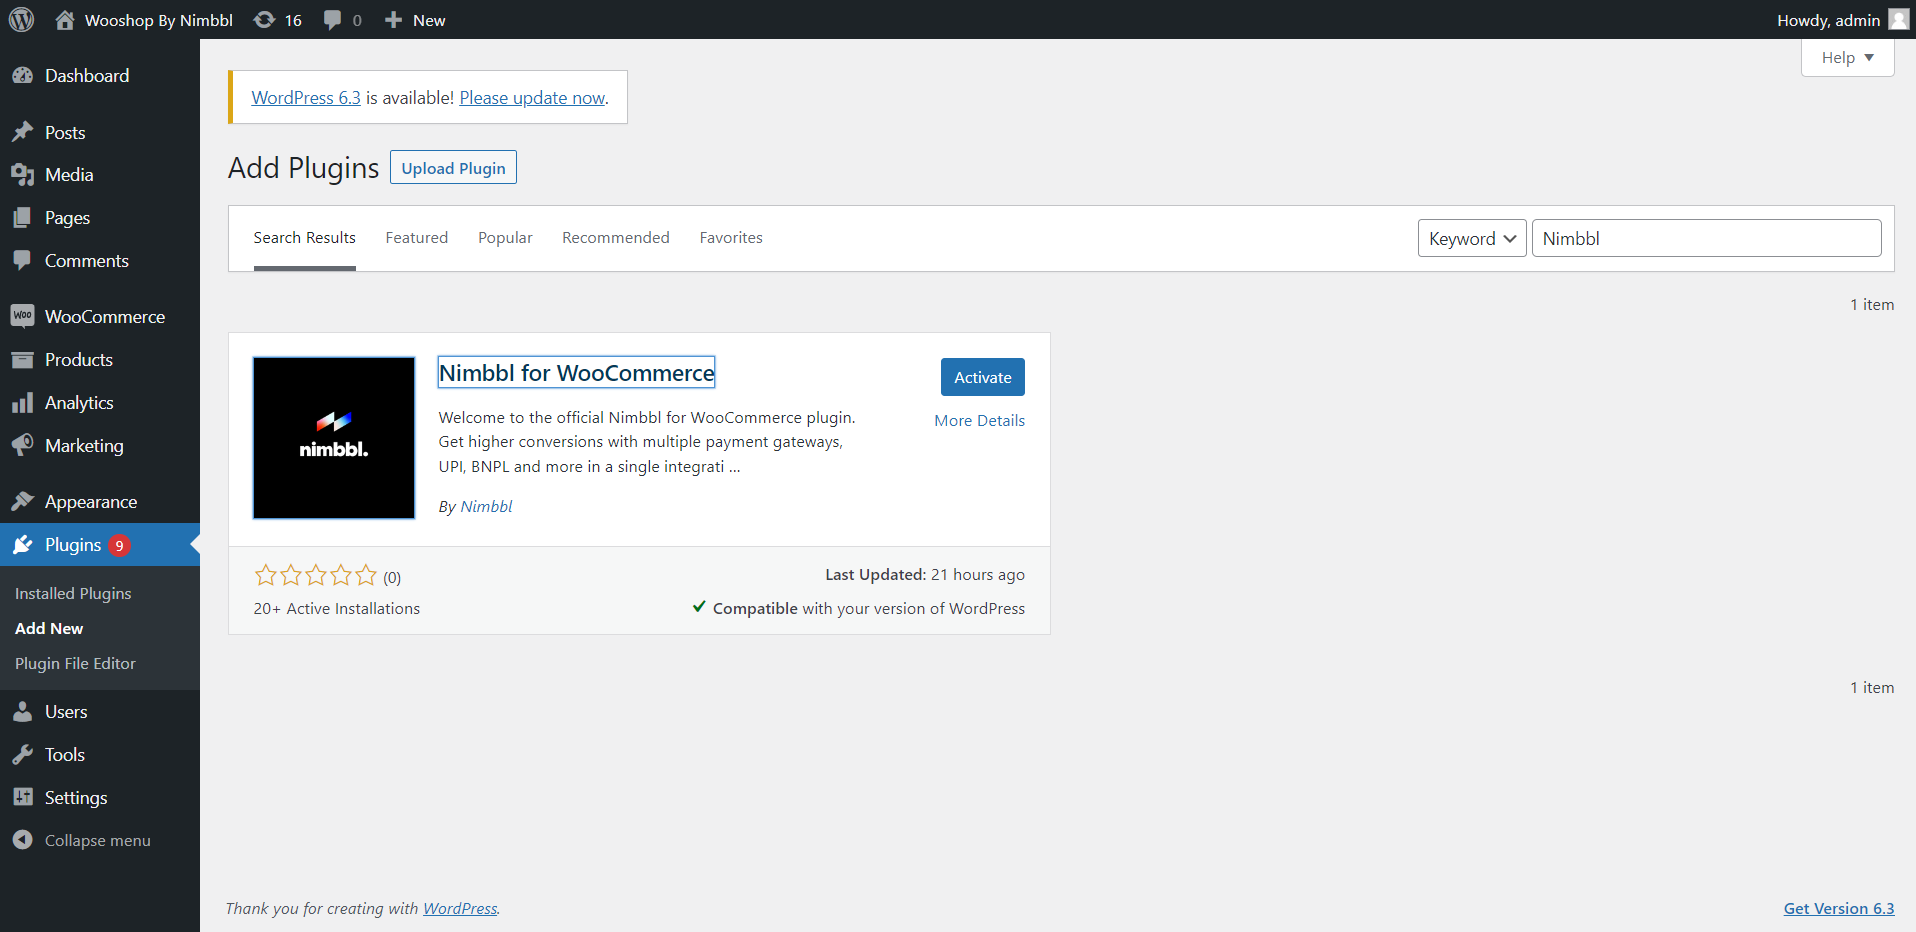
After the installation is completed, click on "Activate"
Installing Manually.
You can manually install the plugin, though we recommend to install it directly from the Woocommerce Plugin Directory.
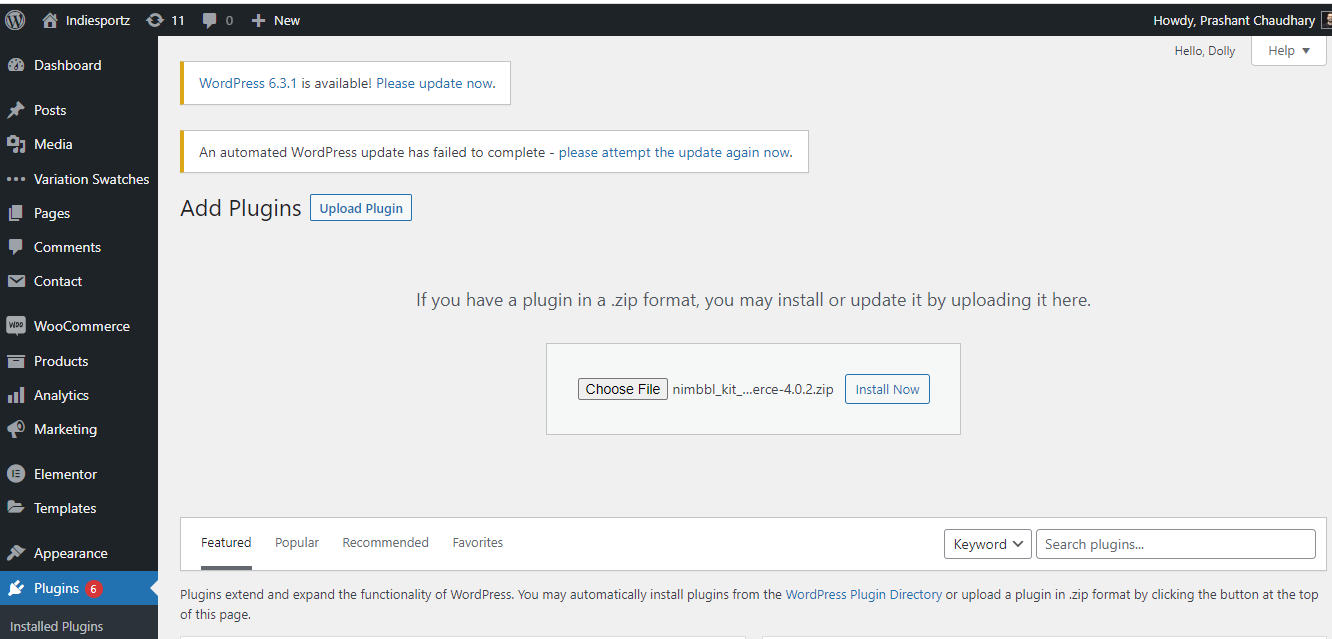
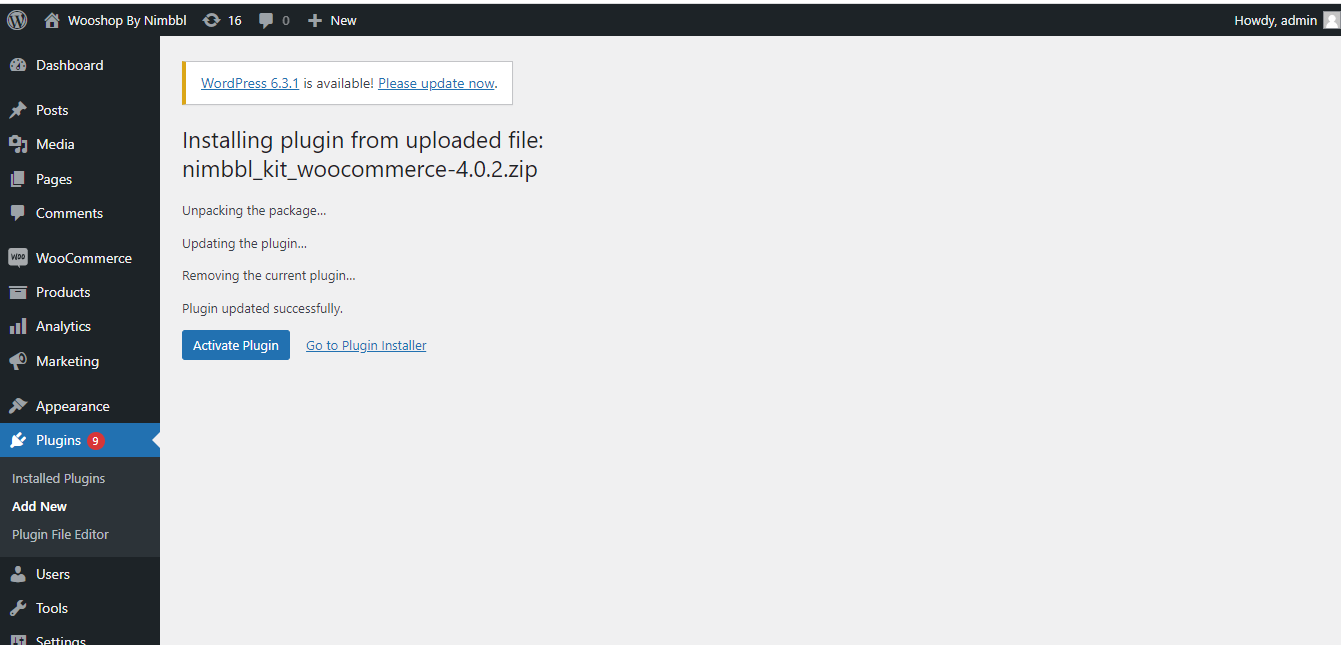
Download the plugin from the latest source code zip file
Select and Upload zip file.
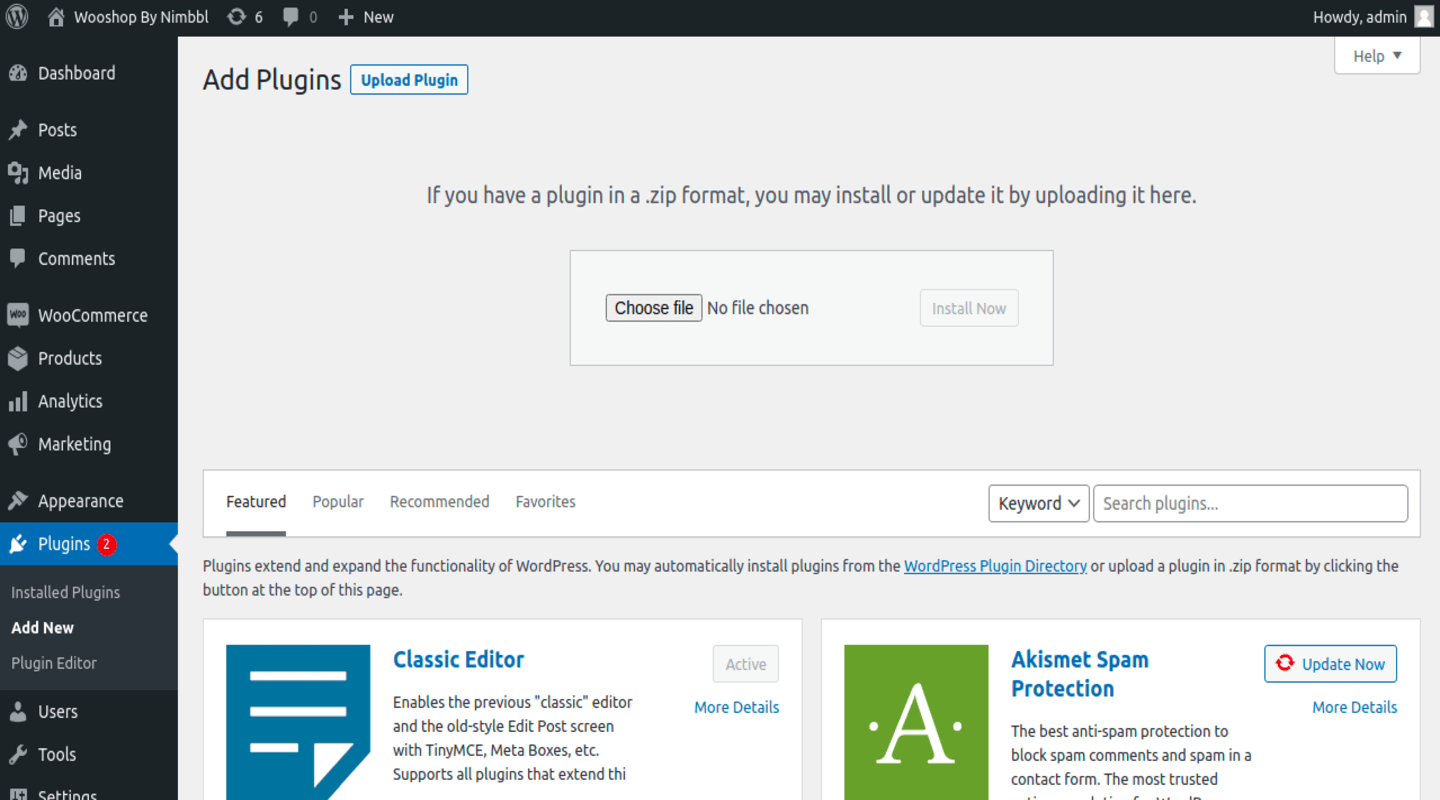
Click on "Install Now".
Click on "Activate Plugin.
Configure Plugin
Once the plugin has been installed, you need to configure it so you can start accepting payments. There are multiple configurations that you can do to customise the plugin for your needs.
Enable Nimbbl
To accept payments through Nimbbl, the plugin should always be Activated. If you deactivate the plugin, the Nimbbl option will not show up on your checkout page.
Log into your WordPress account and go to the installed plugin section.

To Enable - click on "Activate"
To Get Auto Updates - click on "Enable auto-updates"
We recommend, you "Enable auto-updates"
- get the latest features and functionality
- get the updated security patches
Managing Credentials & Environments
The Nimbbl Woocommerce Plugin works for both Test and Live environments. You can configure different keys for each environment and toggle settings to use different environments.
Log into your WordPress account and go to the installed plugin section. Click on "Configure"
Set the Payment Mode to Production (Live) or Sandbox (Test) depending on your requirement.
Add in your Live (Production) and Test (Sandbox)
access_keyandaccess_secretavailable in the Nimbbl Dashboard.
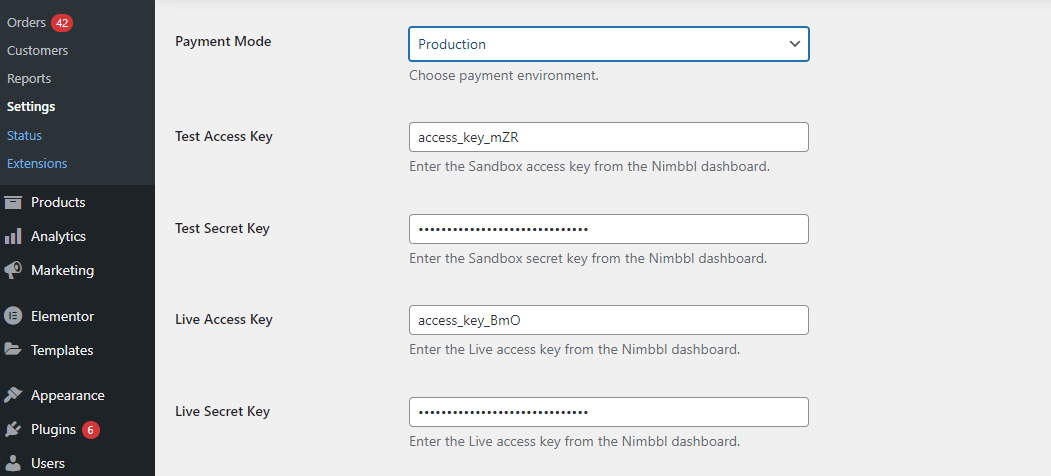
- Using Test keys does not affect your Live data or interact with the banking networks.
- Using Live keys results in actual transactions and money being deducted from your bank or card.
access_secretis like a password, please store it securely.
Setting up Debug Logs
In order to help our team debug any potential problems you are facing on the plugin, we have logs that can be created. A new log files is created each day and contains the transactions for that day.
Log into your WordPress account and go to the installed plugin section. Click on "Configure"
Enable the Debug Mode, this will create logs when enabled. If this is disabled, logs will not be created

You can access the daily logs created under WooCommerce > Status > Logs

- Make sure this folder
<your_directory_path>/wp-content/uploads/wc-logs/has the proper write permission so that the plugin can create the daily log file. - Daily debug logs are expected to consume storage space on your server. Please allocate space accordingly. You can set an archival process where logs older than 30 days can be archived
Setting up Webhooks
The plugin is designed to consume webhooks from the Nimbbl server. These webhooks can help update the status of a "Pending" order if the payment transaction becomes successful in the future. It is rare but totally normal for payments to not succeed in real time. To read about payment states, you can click here.
Log into your WordPress account and go to the installed plugin section. Click on "Configure"
Your webhook URL is automatically generated by the plugin and is displayed as shown below

Share this Webhook URL with the Nimbbl team to whitelist.
- Ensure that your webhook URL is publicly accessible and is not blocked by a firewall
- If you need to whitelist our IP to hit this URL, please reach out to us and we will provide our IP address
Test your Store
Ensure the Payment Mode configured is Sandbox as shown above. You can test your store by using these test values.
Go Live
Once everything is running fine in the test mode, you can write to us at help@nimbbl.biz. We will review your integration and help you get ready to go on production.
In parallel, ensure that you or your team has completed your payment gateway documentation so that the payment partner (PSP) of your choice can approve your credentials.
If you already have live PSP credentials, please keep them handy as we can assist you further with the onboarding process using these keys.
As soon as your account is approved by the PSP and your integration is working fine, you will be able to view your Live Nimbbl access_key & access_secret in the dashboard. To learn how to view and download your keys, please click here
You will need to add the Live keys and toggle the Payment Mode to Production as explained above.
Refunds
Use Nimbbl Dashboard to process refunds for payments made. Refer to the link for detailed documentation on how to process refunds and explore more about Dashboard