Learning how to customise the WooCommerce checkout page for your online store is very important. Why? After browsing your website pages or app, and going through the catalogues, your customers go to the crucial last step – payment. A bad experience can lead to drop-offs, i.e., cart abandonment, resulting in revenue loss. In this article, you’ll learn how to optimise the checkout page for eCommerce stores built on the WooCommerce plugin. It is essential to make your checkout flow or the navigation from one page to another smooth as butter. The default WooCommerce checkout page comes with standard options, but there’s a lot more improvisation you can do to make the process customer-friendly. You can customise the page with a plugin or using custom code, experimenting with different styles to enhance the checkout experience on your WooCommerce shop. Let’s dive in.
Content Index:
- Why customise the WooCommerce checkout page?
- How to create a custom WooCommerce checkout page?
- 10 ways to reduce abandonments in Woo stores
- FAQs
- Final words
Why customise the WooCommerce checkout page?
According to Baymard, eCommerce brands lose close to $18 billion in revenues because of cart abandonment. One of the primary causes of cart abandonment is the tedious payment completion process. Below are three reasons to do it right away.
1. Make payments easier
When you customise the WooCommerce checkout page, you remove all the hassles of making purchases. Your customers no longer have to click their way through several pages to buy their favourite products. Such ease of navigation reduces cart abandonment and helps increase conversions. What’s more, when you speed up the ordering process, you make your customer’s journey easier and faster, which helps boost revenues.
2. Encouraging additional purchases
Spending some time to customise the WooCommerce checkout page lets your customers add many products to their carts with ease. What’s more, if you know how to edit the WooCommerce page, you can make it easy for your customers to select other variants of a product. This increases your order value in the long run. Additionally, for those comfortable with development, customising the WooCommerce checkout page can be done using code snippets, providing endless flexibility for every experience level.

3. Reducing payment failures
When it comes to eCommerce stores, customers’ concerns about payment failures and insecure transactions are quite common. For WooCommerce store owners, it is essential to customise their pages to ensure that customers have a secure and fast 1-Click Checkout experience. By integrating trusted payment gateways and SSL certificates, you can reassure your customers that their transactions are safe. Additionally, optimising the checkout process by reducing the number of steps required and providing clear instructions can help improve the overall user experience. A seamless and secure payment process can lead to increased customer loyalty and sales for your business.
How to create a custom WooCommerce checkout page?
If you don’t know how to do it, it is about time you learned how to customise the checkout page on the WooCommerce site. You can use various methods like using plugins, coding, or using a page builder. One popular method is to use the WooCommerce Checkout Manager plugin, which allows you to easily customise the layout and fields of your page without any coding knowledge.
Two popular ways to edit checkout fields WooCommerce
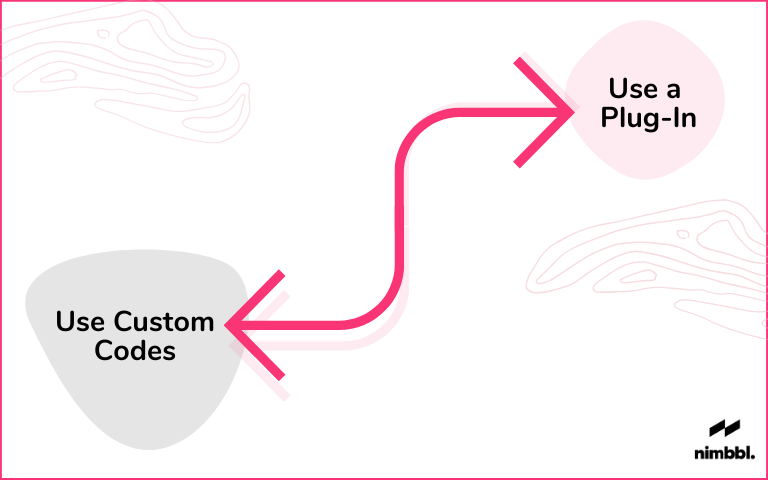
WooCommerce Customise Checkout Page with Plugins (for beginners)
For those who are not good at programming, optimising the WooCommerce page with a plugin can be the best option. The advantage of WooCommerce is that it has several official and third-party add-ons/plugins that optimise your eCommerce store for better performance, help to reduce cart abandonment rates and offer a much better experience.
WooCommmerce Checkout Manager
This is one of the well-known plugins to speed up the shopping and payment process and increase your conversion rates. It helps add options for a single-page experience with minimum input fields, autocomplete fields, etc.
What’s more, it is mobile-friendly and has super-fast “Buy Now” links. It features post-purchase upsells and upsells A/B testing, making it easy for you to gauge what works for your target audience.
Further, it allows a shopper to upload files during the purchase process, especially when booking hotels or renting a car. This plugin allows you to add conditional fields that deliver an exceptional customer experience.
You may also use popular plugins like Cartflows to improve your shopping form, and content on the cart pages. Here’s a detailed video on How to Customise Your WooCommerce Checkout Page with the Cartflows Plugin:
Nimbbl checkout for WooCommerce
Get multiple payment gateway aggregators in one plugin with a superior experience. It does away with split-second delays responsible for payment failures. The 1-Click checkout helps customers complete their payments in seconds. Nimbbl features pre-built integrations with multiple aggregators and access to Buy-Now-Pay-Later providers, all under a single account.
Customise your WooCommerce Checkout Page with ShortCodes
If you’re good at programming, you may also opt for custom code techniques. Some of you may find custom code a bit tricky. The advantage is that you can make minor edits without having to spend money on a plugin. WooCommerce comes with filters for editing the fields like:
- woocommerce_checkout_fields
- woocommerce_billing_fields
- woocommerce_shipping_fields
It is easy to use the woocommerce_checkout_fields filter to edit all the checkout fields. You can remove the billing phone number field or add the shipping phone number field. To edit any field, you need to access the field attributes. For example, you can change the placeholder for Zip to Postal Code or vice versa. Head to the Through Coding section of this blog by Cloudways for detailed information on how to edit it via code.
10 ways to reduce abandonments in Woo stores
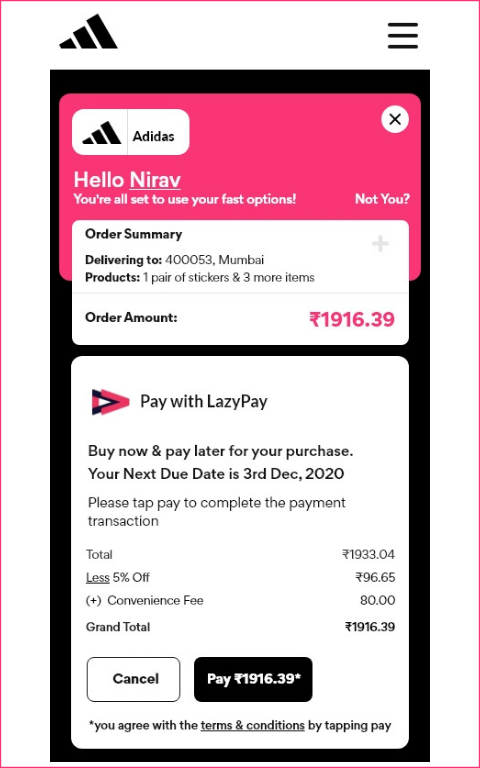
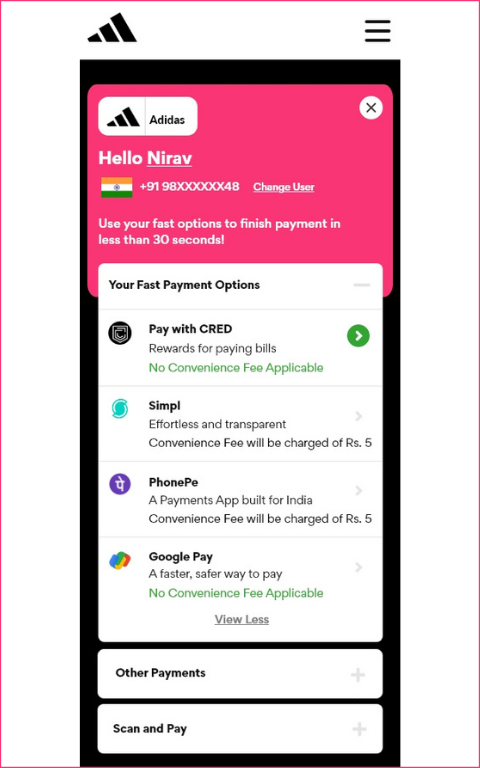
1. 1-Click Experience with personalised payment options
Payment failures are your customers’ nightmare and yours as well. 1-Click Checkout providers like Nimbbl enable faster payments, making the process secure, quick, and simple. Your customers can view personalised payment options, with the fastest one appearing right at the top. Using such trustworthy and fast methods keeps your customers happy as there are hardly any payment failures. Multiple payment options shown in a personalised manner help reduce cart abandonment. A survey indicates that 6% of shoppers abandon carts due to a lack of convenient payment methods. Therefore, all the more reason you can rely on Nimbbl.
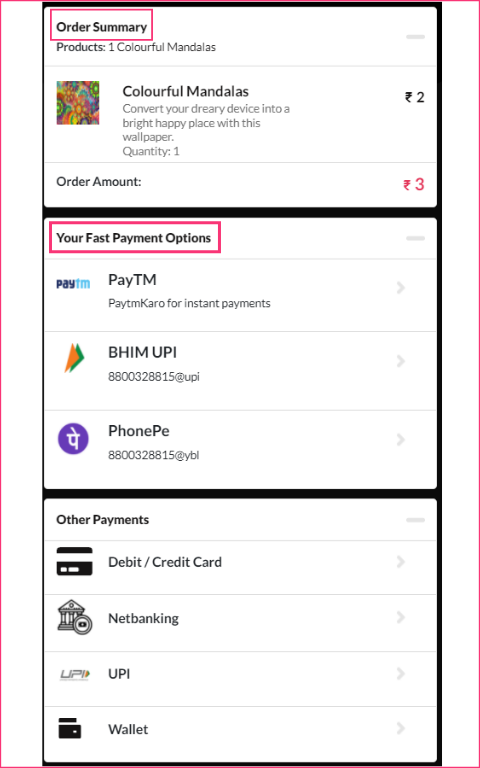

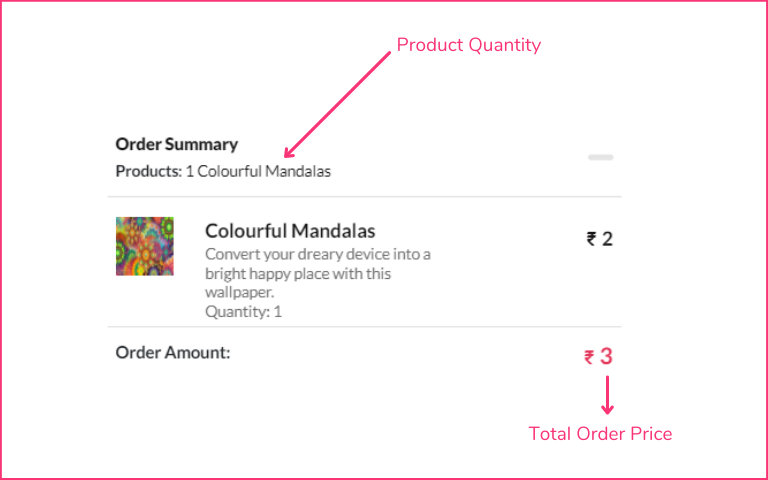
2. Order details on the WordPress payment page
With many online shoppers shopping for multiple products at the same time, they tend to forget what they’ve added to their carts. Displaying the order details like quantity, amount, address, additional charges if any on the payment page helps them quickly review these. Besides, a shopper might want to add a few more items, check the total amount they will be spending. You may simply verify that everything they ordered is on the list.
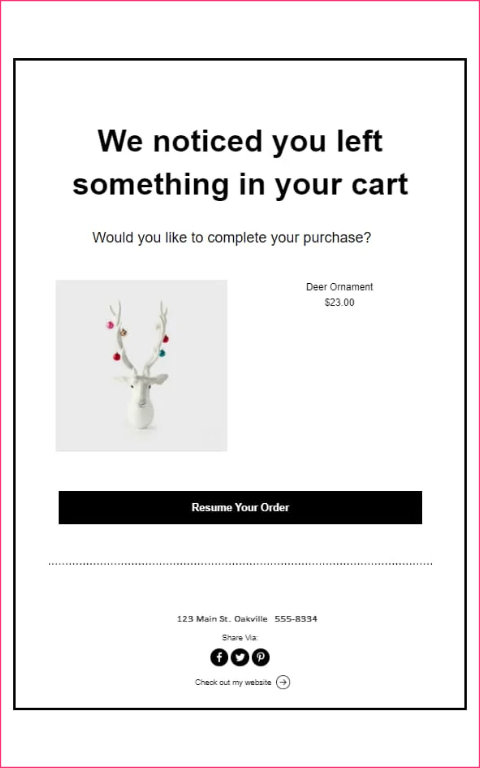
3. Sending ‘Cart Abandoned’ Reminders
Many visitors do online ‘window shopping’ (nobody’s watching, anyway) and fill up their carts. They may be saving the products for later or are just whiling away their time, and you never know. Hence, you can send gentle ‘cart abandoned’ emails instead of taking chances. You can make use of Woocommerce cart abandonment plugins that let you create customised ‘cart abandoned’ emails that can go out automatically.
4. Edit default checkout fields in WooCommerce
One of the best ways to customise the WooCommerce checkout page is to simplify your store’s checkout process. A very complex shopping process can irritate even potential customers, prompting them to abandon their shopping. What’s the point in having your customers fill out endless forms to make a purchase? Surveys indicate that 26% of shoppers abandon the cart because of the tedious and time-consuming checkout process.
Password-less login to access favourite payment methods with a smart and clean presentation goes a long way to improve the experience and curb payment failures and curb cart abandonment. In the Nimbbl checkout, via Eligibility API frameworks, customers are shown their Buy Now Pay Later options, UPI apps, and even their UPI IDs without them having to do any additional steps. This has led to a significant reduction in the time required to complete the purchase, hence, improving conversion rates.
5. Displaying pricing on the product pages
Your customers appreciate transparency. Displaying the actual price boosts confidence and helps build trust with potential customers. Hiding some costs only to spring back as nasty surprises during shopping can only lead to cart abandonment and even cause losing customers forever.
Lack of clarity in prices is one of the major reasons for cart abandonment. This can be easily prevented if the prices are displayed prominently on the product pages. With WooCommerce, you can display a shipping calculator on the shopping cart itself and prevent such unpleasant occurrences.
6. Having a liberal return policy templates
Right from when they place the order until they get the products, unbox them, and start using them, customers are unsure of the performance or satisfaction the products will give. They keep wondering if it is safe to return the products and get an exchange or a refund.
A clear refund policy is crucial to reducing cart abandonment. It is an excellent idea to customise your WooCommerce checkout page with a link to your return policy. Here you can explain the products eligible to be returned; the timeframe within which returns are accepted; and how and when they can expect a refund.
7. Optimise your website page and blog load time
Giving your customers the best experience will keep them happy and bring them back. A painfully long loading time for your web pages can irritate potential customers and increase your bounce rate. Some of them may never return to the site and look for alternatives. While it is crucial to have all the pages on your website load fast, special attention must be paid to the checkout page unless you want abandoned carts. You may want to optimise your product images and use a content delivery network (CDN) to enhance website page performance and WooCommerce performance.
8. Don’t insist on customers signing up
Most customers believe signing up is a tedious process, and there may be many who want to shop just this one time. It is an excellent idea to allow them to shop as guests, saving them the hassles of signing up, and still having them shop at your eCommerce store. You never know, they may like the experience so much that they’ll promptly sign up without being asked to do so.
Most eCommerce stores want to sign up visitors and prefer to save their details, including credit card information. The fact is, however, that 34% of the shoppers would simply abandon their cart rather than spend time signing up. You have a guest checkout feature on WooCommerce, so why not use it?
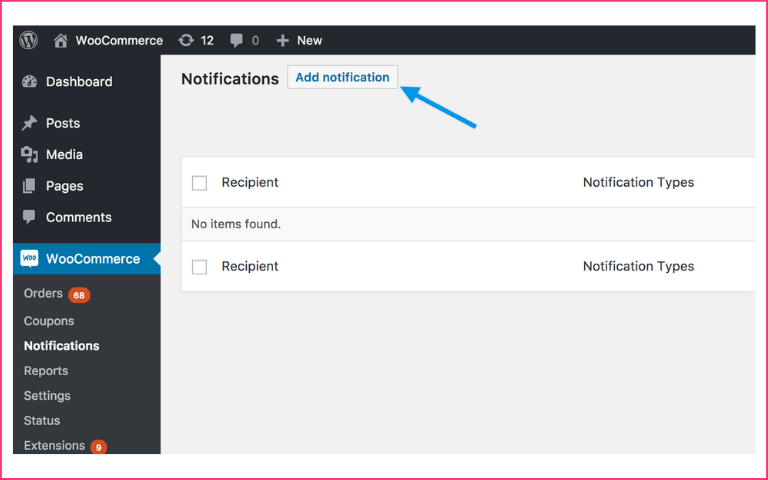
9. Adding notifications during the checkout process
Although it is ideal for making the checkout process as simple as possible, it doesn’t cause any harm by adding notifications or instructions that are useful to customers. The customer can stay informed about the latest news and updates. Adding notifications to your checkout page lets you display your offers like free shipping or cash on delivery (COD) for a minimum-value purchase.
10. Allowing easy access to shipping carts
Shoppers must be able to access their shopping carts quickly, which lets them add or remove products as they go. It also speeds up the checkout process when finding their shopping carts without too many hassles. Making the checkout process as uncluttered and uncomplicated as possible reduces the cart abandonment rates.
Frequently Asked Questions
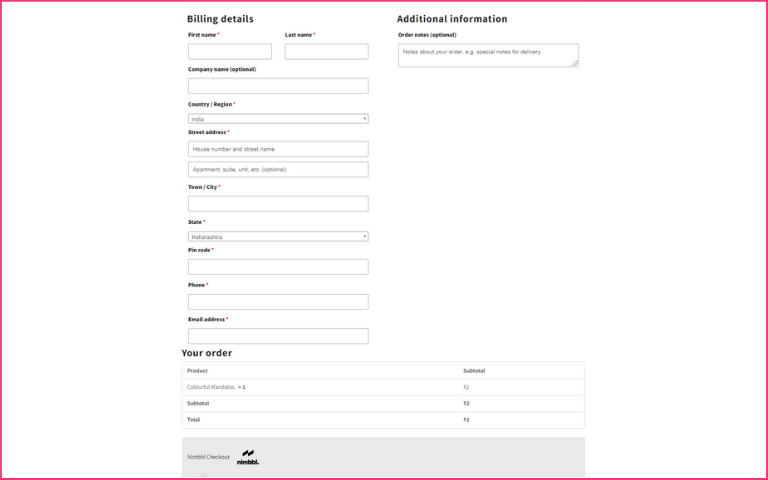
To make it look better, you must first hide all the unnecessary fields, as too many of them can confuse the customer at the last minute. Remember to remove labels from form fields and any other distractions that can divert the customer at the crucial moment of final payment. Additionally, consider customising the checkout fields based on your business needs and target audience. For example, if your business does not typically sell to companies, you can remove the Company Name field. Or you could adjust the placeholder text for the first name field to provide a more personalised experience for your customers. By tailoring the changes to your specific audience, you can enhance the overall user experience and streamline the purchasing process.
Learn how to edit it by following these simple steps. Firstly, you must install and activate the plugin. Next, you need to go to WooCommerce ‘checkout fields’, where it is easy to customise billing, shipping, and order fields under the respective tabs. Next, add a custom field in WooCommerce checkout, select ‘Add New Field’, enter the chosen label name, and click on ‘Add Field’. In addition, you can also modify the options for the field, such as the Company Name field. This allows you to include additional fields in the WooCommerce page according to your requirements and you are good to go.
To change the colour, you must change or override the CSS style of buttons already there by default. To accomplish it, you must add custom CSS to the WordPress theme. Go to the theme’s style.CSS and add custom CSS. You may also use a plugin to add custom CSS to the web pages. You can choose a plugin like Simple Custom CSS, install it, and update it. Additionally, you can use this simple script to apply a custom CSS style and modify the background colour on the payment page.
Your WooCommerce page is based on your website’s theme by default. However, you can change it to suit your preferences or even make some minor changes to the content on the template page. To create a custom theme template, you’ll first need to create a “woocommerce/checkout” folder within your theme’s folder. If you want to customise the template using PHP, we recommend you use a child theme. You can refer to the WooCommerce documentation for guidance on copying the checkout template to your theme’s folder structure.
Final words
Take extra care while editing the checkout pages on WooCommerce. Research the preferences, likes, and dislikes of online shoppers before making any changes based on your intuition. A/B testing may be a good idea to ensure that you don’t negatively impact conversion rates.